Posts

DISABLE THE USB PORT
Image
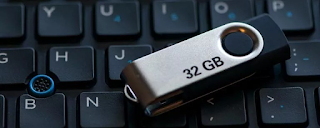
                  DISABLE THE USB PORT   Disable Usb Drives in Registry Editor This method works in all editions of running Windows 10, and it disconnects only USB drives, without affecting the mouse, keyboard, and printer connected via USB. Before editing the registry, it is recommended to create a system restore point. Open Windows registry editor: in the search bar or in the menu to execute (run with the Win + R keys) enter the regedit command and press the Enter key. Go to HKEY_LOCAL_MACHINE \ SYSTEM \ CurrentControlSet \ Services \ USBSTOR. In the USBSTOR section, open the Start ⇨ parameter in the “Value” field, set 4 and click “OK”. Then you need to open Removable Disks: Deny Execute Access To do this open “Computer Configuration” ⇨ “Administrative Templates” ⇨ “System” ⇨ “Removable Storage Access” ⇨ in the right pane, open “Removable Disks: Deny Execute Access”. ter; "> After that choose “Enabled” and click “OK”. Also put is included in “Removable disks: Deny Read Access

FIND VIRUS AND SCAN

Image
  HOW TO FIND VIRUS ON WINDOWS Stay protected with Windows Security Windows 10 and 11 include Windows Security, which provides the latest antivirus protection. Your device will be actively protected from the moment you start Windows. Windows Security continually scans for malware ( mal icious soft ware ), viruses, and security threats. In addition to this real-time protection, updates are downloaded automatically to help keep your device safe and protect it from threats. Windows Security is built-in to Windows and includes an antivirus program called Microsoft Defender Antivirus. (In early versions of Windows 10, Windows Security is called Windows Defender Security Center). ✨If you have another antivirus app installed and turned on, Microsoft Defender Antivirus will turn off automatically. If you uninstall the other app, Microsoft Defender Antivirus will turn back on automatically ⭐ Virus & threat protection -  Monitor threats to your device, run scans, and get updates to help dete

Default file location in msoffice

Image
Customize the save experience in Office     ⭐customize your experience when saving a new file via  CTRL+S  or pressing the  Save  button in the Quick Access Toolbar   ✨Usually use the cloud, but sometimes need to save locally? ⭐ When you want to save locally use  Save As  instead, which, as before, triggers the legacy save dialog. You can  easily add Save As to the Quick Access Toolbar (QAT)  or use the  F12  keyboard shortcut. Or, via  File  >  Options  >  Save , you can check “ Save to Computer by default ” and set “ Default local file location ” to the desired location.  Default file location setub in msExcel, PowerPoint, Project, and Word Click the  File  tab, and then click  Options . Click  Save . In the first section, type the path in the  Default local file location  box

SET WALLPAPER IN DEFAULT

Image
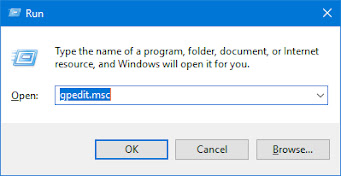
  SET WALLPAPER IN DEFAULT  ✨ Set Default Background Wallpaper for Windows 10 Desktop Using Group Policy ⭐Use the  Windows key + R  keyboard shortcut to open the Run command. Type   gpedit.msc  and press Enter. ⭐Select User Configuration -> Administrative Templates -> Desktop -> Desktop. Double-click the Desktop Wallpaper policy on the right side. ⭐Select the Enabled option, and then type the path of the image you want to set as a default background. Click Apply and OK. ⭐Right click on the Start Menu Button and select command prompt or command prompt (Admin) to open the CMD window. Type:  gpupdate /force  and hit ENTER. DISABLE THE USB PORT.  Disable  Usb Drives in Registry Editor: Open Windows registry editor:  ✨In the search bar or in the menu to execute  (run with the  Win + R   keys )  ✨Enter the  regedit  command and press the Enter key. DISABLE THE USB PORT ⭐HOW TO DISABLE THE USB PORT  Start Windows Explorer, and then locate the %SystemRoot%\Inf folder. Right-click the